Module 2 was all about shape, and based on the industrial theme, which was hardly inspiring, but as I got into it I found lots of interesting shapes, and as is the point with these courses, it really does make you look at everything with new eyes. When I researched the definition of "shape" I came across words I'd never heard of before ... a frustum? a toroid? an ovoid? Oh crikey, what was I in for?
Hubby took me around loads of industrial areas to photograph everything and anything, until we were run off one site by a burly security guard, then in the end I settled on items in hubby's workshop ... spanners, vices, lathes etc ... loads to choose from and right on my doorstep too. My chosen shapes were a set of spanners, and its amazing what you can do with them using computer photo software ... I had great fun!

I find the DMC Cross-stitch software (about $20 from Officeworks) is brilliant for charting your designs. I used it for the cross-stitch and assissi patterns, and also for the canvas work. Here are some pics of my samples and the chart created in DMC software for my experimental canvas work


 We had to draw basic shapes from our chosen theme; colour various pieces of paper in a grey scale; then fill in our basic drawings using torn or cut shapes from our grey scaled papers. These were then cut up and exploded to create new designs. I enjoyed this.


 We were also required to create texture pieces by tearing, cutting, and arranging paper using both plain and painted tonal papers.

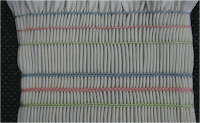
 Then came the embroidered samples: firstly, there were general smocking samples to create ...

 ... then onto the experimental pieces. My first experimental piece was created by smocking on 3 pieces of a checker patterned cotton fabric. I then replicated the smocking stitches directly onto the background fabric as surface embroidery inbetween the 3 smocked pieces. Painted squares were then randomly stamped on the background fabric to bring the fabric pattern into the design as a whole, these were then highlighted with stitches down two sides of the painted squares. It's a very uniformed design, but I am happy with it.
 My second experimental sample was, once again, based on my line design from Module 1. This was created using reverse smocking on a multicoloured cotton fabric, embellished with beads and cord, with smocked suffolk puffs which were filled with buttons. I tend to always use the same colours for a lot of my work, but this time I used these happy colours and I'm pleased with the outcome.


